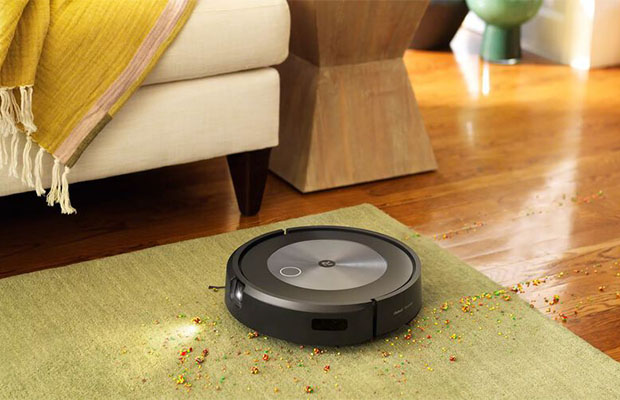
The dustbin and filter are distinct objects. Of course, it serves a purpose and requires maintenance on its own. Roomba is a big help with cleaning, but it can’t do the cleaning by itself.
You must regularly maintain your robot vacuum if you want it to operate at peak efficiency. How to clean Roomba filter? First, open the bin door and empty it into the trash; Pushing down and removing the filter will clean it. Tap the trash can gently with the filter. After that, put the bin back inside the robot after returning the filter to it.
Easy peasy, you can clean the Roomba filter. All you need to do to get started is follow our clear and concise instructions.
Read More: Does Roomba go over rugs?
Table of Contents
Why Should We Clean A Roomba?
To begin, could you please explain why it is crucial to regularly clean a Roomba? The numerous (small) parts that make up an iRobot Roomba can easily become filthy. Consider a sensor screen or a side brush that must thoroughly sweep the baseboards of dirt.
Performance degradation could occur if parts aren’t cleaned and maintained on a regular basis. It may even happen that the robot vacuum cleaner loses the ability to identify furniture or vacuum at all. At a glance, common issues:
- Roomba has reduced suction and leaves a lot of dirt
- Makes more noise than usual
- It no longer runs smoothly, cornering issues
- Bumps into furniture no longer recognize obstacles
- iRobot Roomba stinks
Numerous of these issues can be avoided by routinely cleaning a Roomba. In fact, it might increase the lifespan of the vacuum cleaner.
How To Clean Roomba Filter?
1: Press The Bin Release Tab Button
The dustbin contains all Roomba filters.
However, before you can clean the filter, you must remove the dustbin from the appliance.
Locating the bin release tab is the first thing you need to do.
Check the backside of your Roomba and look for the bin icon.
Note: There is a real bin icon in only some of the series. usually the most recent series to be released.
The bin release tab can be found in one of the following places, depending on the Roomba series you use:
- For the S series: on the Roomba unit’s middle-top surface.
- For the j, e, and i series: at the side surface of the back of the Roomba unit.
- Regarding the 600, 700, 800, and series: at the top surface of the back of the Roomba unit.
When you press the bin release button, you should hear a “click” sound.
2: Take Off The Dustbin From The Unit
The Roomba dustbin should then be removed from the device.
Here’s how you should remove the Roomba dustbin, again depending on the series you use:
- With the s series, pull it upwards.
- As for the e, i, and j series: by pulling it sidewards.
- The 600, 700, 800, and 900 series: by pulling it sidewards.
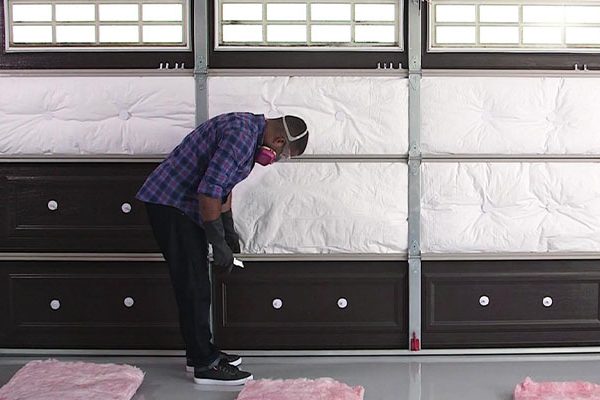
Health tip: Wear a face mask whether or not you have allergic rhinitis. As the dust, dirt, and allergen that has accumulated in the trash can could cause an allergic reaction. Additionally helpful are a pair of hand gloves.
3: Open Either The Dustbin Or Filter Door
To determine which step applies to you, read this one very carefully.
The dustbin contains some filters. While some are only placed at the sides.
The filter is positioned on the right side of the trash can (facing the trash can door) for the e, i, and j series. Consequently, you won’t need to open anything. This step can be omitted!
The filters are all inside the Roomba Series s, 600, 700, 800, and 900 models.
The following is how to access their Roomba filters:
- For the s, 800, and 900 series: open the filter door located at the top.
- Within the 600 and 700 series: open the dustbin door located at the right side.
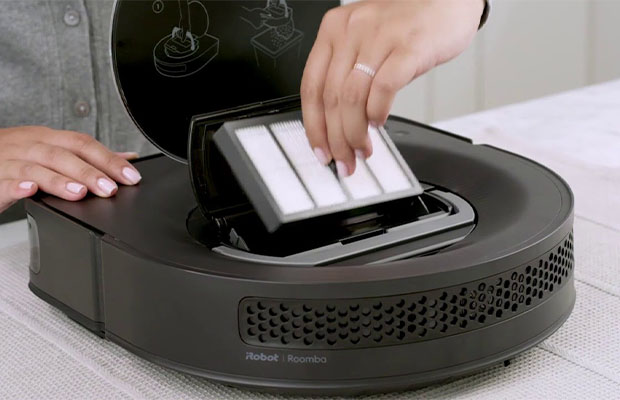
4: Remove The Filter From The Dustbin
The filter needs to be taken out of the trash can for the final step.
Depending on the series, Roomba filters come in a variety of sizes and shapes.
For instance, the s, 800, and 900 series filters are made as rectangular blocks. While the rectangular blocks for the e, i, and j series filters are smaller but more substantial.
700 series filters also come as small rectangular blocks, only that it comes as a smaller pair of two. affixed to the inner tops of the dustbin’s left and right sides.
But 600 series filters have an almost half-circle shape. attached to the inner top of the trash can.
The following instructions will vary depending on the Roomba series you use:
- As for the 800 and 900 series: grab the yellow tab and pull it upwards.
- For the 600- and 700 series: grab the sides of the filter and pull it forward.
- S series: Take hold of the tab in the filter’s center and pull it upwards.
- For the j, e, and i series: grab the top and bottom of the filter and slide it to the right.
It might take some strength to remove the filter from the trash can. For the sake of not breaking or harming the Roomba filter, however, be sure to pull it as gently as you can.
5: Shake Off Dirt And Dust
Remove the dirt and dust stuck on the filter by going to the closest trash can. Simply shake off the filter or tap it against the bin’s edge to do it.
Important note: Filters are not intended to be cleaned or to come into contact with any kind of liquid. Therefore, never try to clean the Roomba filters or even just wipe them with a damp cloth.
Its filtering abilities can be removed by washing it in warm or cold water. decreasing the effectiveness of its filtering.
Try using only a tweezer or other similar objects to remove any dirt or dust that has become stuck on the filter. To the greatest extent possible, take care to avoid touching the filter’s mesh fibers.
It is obviously time to replace your Roomba filter if you notice it becoming “dark.”
Filters that are overused perform less well. Because its mesh fibers are almost certainly harmed. As a result, it is unable to remove dirt, dust, allergens, and other particles effectively.
6: Wash The Dustbin Using Warm Water
Important note: Not all Roomba dustbins are washable, and doing this is optional. Be sure to read through your user manual.
The e, i, j, and s series of Roombas are a few that have washable dustbins.
If you have a washable trash can, you can wash it to get rid of any extra dirt that has accumulated on it. especially on the lids and inner corners.
You must keep in mind, though, that a washable trash can must only be hand washed. The dishwasher should not be used to wash it.
When cleaning a washable Roomba dustbin, keep the following in mind:
- Only use warm water, please.
- Don’t use a hand blower; let it air dry.
- Remove the filter and set it aside.
- To access the interior corners, open every lid.
7: Reinsert The Filter To The Dustbin
Put the filter back in its place after the dustbin has dried and been thoroughly cleaned.
Here’s how to reinstall the Roomba series’ filter:
- For the 800 and 900 series: grab the top of the filter and put it back on its filter compartment.
- Take hold of the tab in the center of the filter for the S series and replace it in the filter compartment.
- The 600 and 700 series: grab the sides of the filter and attach it back to the inner top of the dustbin.
- As for the e, i, and j series: grab the top and bottom of the filter and slide it back to the right side of the dustbin (facing the dustbin door).
The filter is properly and correctly positioned if you hear a “click” sound.
8: Close Either The Dustbin Or Filter Door
Close the dustbin or filter door if the Roomba filter is already in place and securely fastened.
You won’t need to close anything for the e, i, or j series. Considering that the dustbin’s right side is the only place where the filter is attached. Therefore, you can omit this step!
Following are some recommendations for other series:
- The 600 and 700 series: close the dustbin door by pushing it forward.
- S, 800, and 900 series close the filter door by pushing it downwards.
Once more, when the dustbin or filter door is successfully closed, you should hear a “click.”
If it doesn’t close, the filter is positioned incorrectly. Try once more to take the Roomba filter out and reinstall it.
9: Return The Dustbin Back To The Roomba Unit
Put the dustbin’s Roomba compartment in place, then secure it.
The way you ought to secure the trash can will depend on which model of Roomba you use:
- Place the dustbin in the empty space at the top middle of the Roomba unit for the s series.
- For series 600, 700, 800, and 900: place the dustbin at the empty compartment located at the side surface of the back of the Roomba unit.
Your Roomba robot vacuum should be left to dock at its Home Base when not in use.
Put the machine back where it was before, or pause your Roomba if it is in the middle of a cleaning cycle. Let it carry out the rest of the cleaning process.
Read More: How to Get Spray Foam Off Skin?
How Often To Clean Roomba Filter?
Nothing in this world, including the Roomba, can, of course, last for a very long time without regular maintenance. Therefore, the key is to regularly clean the filter on your little helper if you want it to occasionally work effectively.
A good filter should clean once a week, or twice if you have pets in the house, according to iRobot’s advice. You must clean the filter once every two weeks if you use your Roomba frequently.
Additionally, rinse the Roomba bin frequently with warm water and let it air dry.
You should perform midlevel maintenance on your robot vacuum once per week, every Sunday, or whenever you have some free time. You need to get ready with a screwdriver once a month when it’s time for a more thorough cleaning.
When Should The Roomba Filter Be Replaced?
Let me remind you that cleaning your Roomba filter is only the first step in the process. There are still many components, including brushes and wheels, sensors, and electrical contacts, that require routine maintenance.
However, cleaning eventually loses its ability to improve performance.
It’s essential to change your Roomba filter after some time of use. In actuality, iRobot advises replacing this component once every two months, which is quite frequent. After more than two months, if you haven’t changed your Roomba filter, you should.
For your information, iRobot does provide reasonably priced three-packs of replacement filters for the Roomba 500 and 600 series: for only $25. There is no need to leave the house because you can still find genuine Roomba replacement parts on Amazon at fantastic prices.
The Bottom Line
After reading this post, you must already be aware of how to clean a Roomba filter. In order for Roomba to operate at peak efficiency and to give your home significantly cleaner air, cleaning is necessary.
Without routine cleaning and maintenance, it won’t matter how effective it is for long. The simple advice in today’s guide will help you clean the bin filter.
Please leave a comment below if you’d like more information.