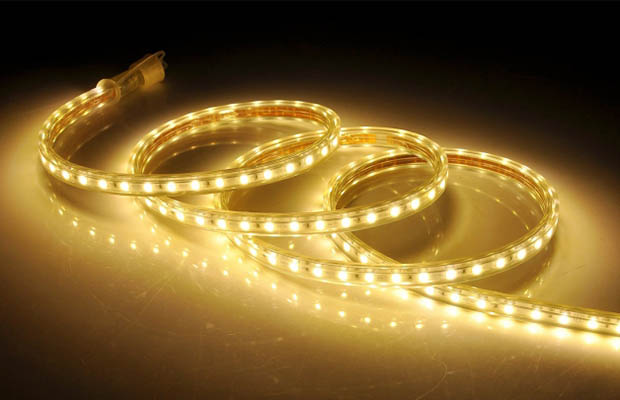
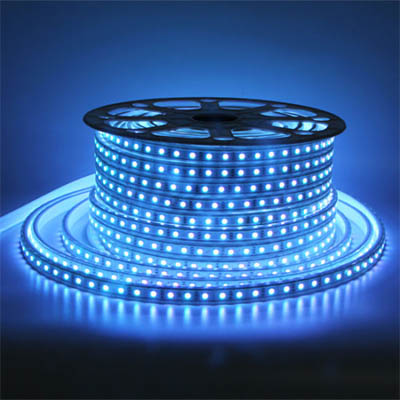
The general functionality of LED light strips is one of their best features. You can attach them to just about anywhere if it has a flat surface.
It becomes a little more challenging, though, when you need to cut or modify something. So can you cut LED light strips?
Of course, we can cut LED strip lights. When cutting your particular LED strip lights, there are some dos and don’ts to keep in mind. This article will shed some light on the question.
Table of Contents
Can I Cut Led Strips Lights?
There is no “one size fits all” solution when it comes to LED strip lighting. But regardless of whether you need flexible or rigid lights, monochromatic or RGB, waterproof or not, the majority of LED strips will have one thing in common: they can be customized in length.
Each LED strip will have black lines that are either straight or have dots along them at regular intervals.
The safest locations to cut your LEDs without causing any damage are where the circuits are completely closed.
Each LED strip will have a different set of cutting lines. They are typically every three LEDs as a general rule of thumb. Therefore, the cutting lines will typically be every 10cm if, for instance, there are 30 LEDs in a meter.
Copper soldering pads that look like they are symmetrically arranged should be on either side of the black cutting line. To make sure you’ve correctly identified the cutting line, look for these copper pads.
Advantages Of Cutting LED Strip Lights
Cutting your LED lights into strips has many benefits. Here are some of them:
Without having to spend more money, you are able to purchase the precise number of light strips that you require for a given project.
To create a special design or pattern for your project, you can use the extra pieces and combine them in different ways.
Disdvantages Of Cutting LED Strip Lights
You might need to purchase heat-shrinking tubing to protect your LED strip lights after you cut them.
This job can be quite costly if you don’t know how to solder. due to the possibility that your LED strip light components won’t work.
Possibly not as bright and effective as they once were, the LED strip light pieces. Losses in time and money will result from it.
Types Of Led Light Strips That Can’t Cut
Several different kinds of light strips shouldn’t be cut, including.
The first is the use of light strips that are individually controlled by IC chips. Along the light strip, these dark chips are positioned after a few diodes.
They each only individually control a small number of diodes, hence the name. This enables a light strip to display various colors in each section. Furthermore, if you make a cut, you run the risk of ruining the entire roll or section.
If You Cut LED Lights, Will Both Sides Still Work?
Both sides of the light strip will function if they are properly marked for cutting and reconnected with the proper polarity.
The majority of light strips will have markings that are similar and indicate where to cut. The copper sections that appear every few inches along the length of the light strip roll are where the cut should be made.
Cut the light strip so that there are enough copper markings on each side. In this manner, when they reconnect, they can each create the appropriate connection points to allow electrical current to pass through a connector and both sides of the light strip.
Tools & Equipment Needed For Cutting LED Strip Lights
You need a few different tools and pieces of equipment in order to cut LED light strips.
To make the job easier and more efficient for yourself, we strongly recommend that you use the following:
● Wirecutter/stripper
● A Heat Shrinking Tubing
● Two small pieces of wood/plywood tape
● Tape measure
● Soldering iron
● Exacto knife
How To Cut LED Light Strips?
Make sure the light strip you purchased can be cut before cutting it; otherwise, cutting it may render it useless. Also, remember to turn off the power before cutting the light strip; cutting a light strip that is directly connected to a power supply is very risky.
Step 1. Measure The Length
You must cut off the extra length if the LED light strip you purchased is too long. Taking the proper length measurement should be your first step. You’ll waste your time if you unintentionally cut the strip too short.
Step 2. Look For The Scissors Logo On The Light Strip
On the section of their LED light strips that can be cut, manufacturers have affixed a scissors logo for the convenience of users. You must locate the scissors logo prior to cutting to prevent injury.
Step 3. Cut With A Pair Of Scissors
Using your scissors, cut the extra strip along the line indicated by the scissors logo as the last step. Make sure to cut straight; if you accidentally cut diagonally, the light may stop functioning.
Steps To Fix Led Strip Lights When Cut
Step 1. Buy Lepro 4-pin Led Strip Light Connector
You must select the proper strip light connector based on the type of light strip since there are many different types of connectors. The 4Pin connector you choose must be compatible with 10mm if your light strip is 10mm wide. If you buy a 10mm connector but your light strip is only 8mm wide, it won’t fit. However, the 4pin connects are the most widely utilized. Lepro’s 4-pin strip light connector pack includes 5 pieces of L-shape and 5 pieces of line-shape connectors, making it ideal for both 90° corners connection and extension along a straight line. It can be used in nearly all situations.
Step 2. Open The Connector
The connector must be opened from the side if it has a cover.
Step 3. Place The Light Strip Into The Connector
The connector’s fastening clips should accept the two cut ends of the LED light strip. You should now follow the directions in the picture to make sure they are not reversed.
Step 4. Cover The Connector
Close the connector’s cover after installing the light strip, then test to see if it lights up normally once the power supply is connected. The connecting point between the connector and the light strip may need to be adjusted if the connected components do not illuminate normally.
Reconnecting the strip after cutting is generally a challenge. Additional connectors must be purchased, and any improper use could render the strip useless. In order to prevent waste, it is best to ensure that the length required is accurate.
How To Reconnect Cut LED Strips?
- Before beginning, turn off your strip lights.
- Take accurate measurements. As the saying goes, “measure twice, cut once.”
- Choose a connector based on whether it needs to be straight or angled at a 90 degree angle.
- Cut the copper section along the marked cut line using regular craft scissors. On your strip light, this copper section is spaced at intervals of a few inches.
- There should be an equal number of copper sections leftover for each strip of lighting. Your connector pins must have this in order to function.
- Peel back any adhesive backing before connecting with your small plastic gapless or jumper connection to ensure a clean connection.
- Each segment of the strip light should be gently inserted into the connector piece.
- Snap the strip lights into place using the tiny clamps on the connector.
- Ensure that the correct direction is facing out on both sides of the strip light. Voltage must pass through with the proper polarity.
- Check for light on both sides of the connection after plugging in your strip lights.
- Check the polarity and, if necessary, reverse the strip light if there is no light on the newly installed section.
How To Connect Multiple LED Strip Lights?
It is most likely that you will need to cut and connect the LED light strips to one another, unless you are working on a very small lighting project. In actuality, this is one of the main benefits of choosing LED tape lights.
To illuminate larger areas and special crevices, you can combine several strips. There are two ways to connect LED tapes to one another.
Clipping
The simplest method for connecting two LED strips is by using a connecting clip. Two LED strips can be connected using a male-to-male clip. This clip can come in different forms:
- Hippo Buckle LED Strip Lights Connector: Two LED strips can be connected to one another quickly and easily using the Hippo Buckle Light Strip Connector. This connector has space on both ends for an LED light strip.
All that’s required to connect the two strips together is to position the Hippo Buckle connector with one end of the strip. Because the connector has a “buckle,” the strips will remain in place once installed.’
You can use these connectors to join two strips together or to connect your LED strip to the power source. The connectors work well in both situations to increase the maximum distance that your LED light strips can travel. RGB and single-color LED light strips can be connected to each other using this connector. - Solderless LED Strip Lights Connector: Hippo clips are great for connecting single LED light strips to one another, but they are insufficient for connecting parallel LED tapes together. This larger solder-free LED light strip terminal (available on Amazon) shines in this area. Multiple LED strip connections can be made because there is enough room for them.
This connector can be used to connect RGB and single-color LED tape lights to one another. LED strip lights that can be dimmed can also use it. Plastic clips that help maintain the connection’s security are used to hold the LED strips in place. - Solderless LED Wire Connector: You might need the LED light strips to pass through a corner or a unique curve for your project. In this situation, a solderless LED wire connector (available on Amazon) will work. These wire connectors have clips on each end that let you connect two LED light strips together. Your LED light strips will illuminate a greater area thanks to them.
The wire connector is a great way to handle corners and other areas of your space where the light won’t be required. The reason is that these wires do not have LEDs mounted on them. They are only utilized to lengthen the strips. Single-color and RGB LED strip lights can be connected to one another.
Soldering
LED light strips can be quickly and easily connected to one another by clipping; however, there are some instances where clipping is not appropriate. For instance, clips cannot be used to join strips if they will be mounted with aluminum frames. In this case, soldering will be required to connect the LED strip together.
Soldering together LED strip lights is not a particularly difficult process. But you do need some difficult-to-master specialized equipment.
To connect two LED strips together, first cut them to the desired length, then remove the covering to reveal the strips. Each strip’s ends should be precisely joined before being soldered together.
What To Do If Light Strips Don’t Work After Cutting?
Check the connection where the cut was made first if you cut your light strips and they don’t work.
Find the next pre-marked copper cuttable section on the light strip and make the cut there if you accidentally made one where you weren’t supposed to. Afterward, re-join the circuit by using a wired jumper connector cord or a back-to-back connector.
To troubleshoot, refer to the following bullet points:
- Check for a loose connection
- Make sure the polarity is correct
- Make sure you left enough copper on the cut for each side to connect
- Make sure you’re getting power to the lights
Where To Cut LED Light Strips?
LED light strips can’t just be cut anywhere.
In most cases, the entire roll of LEDs in a strip light has copper markings. To facilitate cutting, the markings are typically spaced out every few inches.
Craft scissors can be used to cut precisely along the black center line.
You must leave the copper exposed on each end of an LED strip light, so be sure to cut precisely in the center.
Power transfer from one section to the other must occur when connecting two sections together.
How To Use LED Strip Lights After We Cut?
Step 1. Make Sure The Wall Is Dry And Clean
Please clean the wall before attempting to attach the light strip to it. The LED light strip cannot be properly attached to a wet or dusty wall.
Step 2. Paste The Led Light Strip
You can remove the covering from the 3M super glue behind the light strip and paste it in the desired location after cleaning the wall.
Step 3. Connect The Led Light Strip
If you bought an LED light strip set, it ought to have a controller and a connector. Connecting the light strip and the controller should be done using the connector. Please pay attention to the front and back when attaching the light strip and connector. The light strip won’t function properly if it is inserted backward.
Step 4. Plug In The Power And Turn On The Led Light Strip
The controller must be connected to the power source in order for the LED light strips to turn on.
If the LED light strip is still not lit after following the above instructions, make sure there is no connection problem. If the set-up is normal, cutting the light strip may have resulted in damage, so take extra care and always cut in accordance with the logo on the strip.
When To Use LED Light Strips?
Our perspective and mood are affected in different ways by lighting. Nevertheless, we frequently take the things we use for granted, from the light in the office to the supplies in the kitchen when preparing a meal.
Sometimes it’s difficult to comprehend that this technology has only been around for about 150 years. Even more recently developed than that is LED lighting.
Installing LED lighting throughout your home is one of the best ways to elevate your mood. Your rooms can feel like a natural extension of your personality by incorporating task lighting, various colors, or original interior design ideas.
Under cabinets and hanging shelves is the ideal location to install LED light strips. A better-lit space that is safer and simpler to use can be made. When the ambient light is inadequate, these spots make excellent accent lights that will ease your eyes’ strain.
To light up walkways and areas that are accessible by foot, you can also place LED light strips under lower cabinets. By doing this, you can possibly stop some of those late-night toe-stubbing incidents.
If you need color and brightness in dimly lit areas, consider an LED light strip. Try experimenting with strips to create various moods in areas that are well-lit.
To get unusual results that you’ll like, you can even put LED light strips under your bed, behind your computer monitor, or all around your television.
You should decide whether you want to use white LEDs, an RGB strip, or RGBW lights before buying LED lights. You should consider the application because different brightness levels might be available. For instance, task lighting has different brightness requirements than accent lights near a TV.
Once you have the LED light strips, you can measure to determine the length required. Cut only at the predetermined points after that. Constantly refer to the product’s instructions if you have any questions.
FAQs
Can You Cut LED Lights If They Are Too Long?
They can also be cut to custom lengths, which means they can be potentially made to meet the requirements of any installation, no matter how big, or how small.
Can You Reuse Led Strip Lights?
Yes, of course. With easy steps, you can finish it.
Read More: Can you reuse led lights?
How Many LED Strips Can You Connect Together?
The specifications of the LED strips you’re using will ultimately determine how many you can connect together. You must confirm that the strips you are connecting have the same specifications and that your power supply can support having multiple strips connected. With power coming from just one end, multiple strips from WeLoveLEDs can be powered continuously for up to five meters.
How To Connect LED Strip Lights To One Power Supply?
LED strips can be connected to a single power supply for convenience. You must purchase a connector wire with a clip that can hold the LED strip because this will need some straightforward wiring.
You must first slide the LED strip into the connector wire’s clip before you can connect it to a power source. Close the clasp by aligning the ‘+’ sign on the tape with the red wire and the “-” sign with the black wire. This step might require you to remove some of the adhesive backings from the strip. In order to use your power supply, the connector wire must first be plugged in. A power adapter with a higher output wattage that can efficiently power bigger lighting systems is an LED transformer, which you might want to buy if you want the most power.
Why Might Your Cutted LED Light Strip Not Function Any Longer?
If your LED strip still does not function after being cut, your RGB strip light most likely has a short circuit. This issue typically arises if you cut the strip in a location that hasn’t been designated as a cut point. Make sure to only cut the copper markers.
How Do You Pick The Best LED Power Supply?
The wattage needed to power your LED lights will determine the power supply you select. A larger light system might require an LED transformer, a high wattage power source that can power long, wide light systems. A 24v LED strip should only be connected to a 24v power source in order to maintain voltage compatibility.